
【Python&RS】Rasterio库安装+基础函数使用教程


.png)


Rasterio是一个Python库,专门用于栅格数据的读写操作。它支持多种栅格数据格式,如GeoTIFF、ENVI和HDF5,为处理和分析栅格数据提供了强大的工具。RasterIO适用于各种栅格数据应用,如卫星遥感、地图制作等。通过RasterIO,用户可以方便地读取、写入和操作栅格数据,提高数据处理效率。此外,RasterIO还支持自定义栅格数据类型和变换操作,具有很高的灵活性和可扩展性。总的来说,RasterIO是一个功能强大、易用的栅格数据处理库,对于遥感、地理信息系统等领域的数据处理和分析具有重要意义。
1 Rasterio库安装
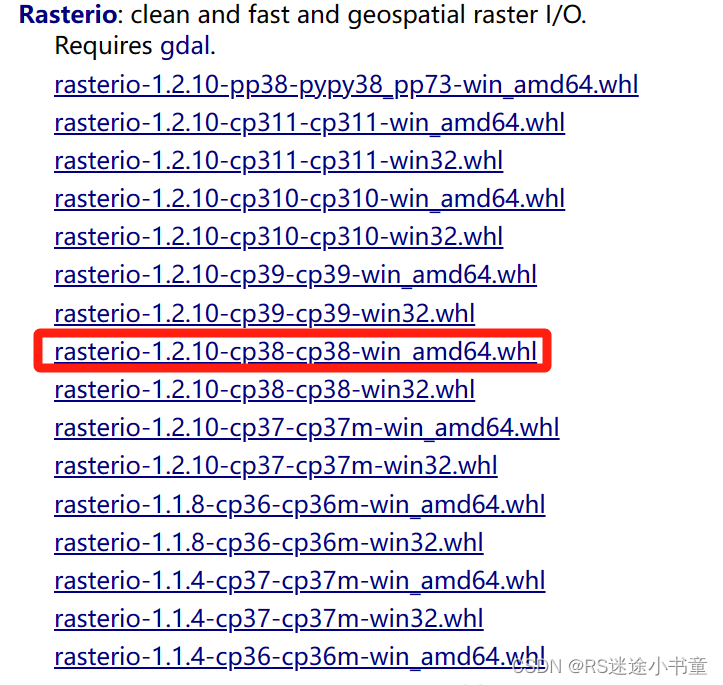
Rasterio依赖于pyproj、Shapely、GDAL、Fiona、geopandas、rasterio等库,如果你之前安装过GDAL就大可不必担心,因为GDAL的使用包揽了这些库。如果没有我建议直接安装rasterio库,然后报错什么库就安装什么库。注意自己的Python版本号!!!下载地址:Rasterio库
2 导入常用函数
这些都是我后面代码需要使用到的函数,注意要导入,别到时候报错。
import os
import rasterio
from rasterio.plot import show
from rasterio.windows import Window
3 基础操作代码展示
3.1 获取影像基本信息
def Get_data(filepath):
    ds = rasterio.open(filepath)  # 打开文件
    ds_bands = ds.count  # 波段数
    ds_width = ds.width  # 宽度
    ds_height = ds.height  # 高度
    ds_bounds = ds.bounds  # 四至范围
    ds_geo = ds.transform  # 仿射地理变换参数
    ds_prj = ds.crs  # 投影坐标系
    # print(ds.crs.wkt)
    # ds.nodatavals  # 缺失值
    # ds.dirver  # 数据格式
    print("影像的宽度为:" + str(ds_width))
    print("影像的高度为:" + str(ds_height))
    print("仿射地理变换参数为:" + str(ds_geo))
    print("投影坐标系为:" + str(ds_prj))
3.2 读写数据
这里的读写其实都和GDAL库差不多。读取的话都是读成数组,然后可以选择波段和读取范围;保存时都是选择波段数、仿射地理变换参数和投影信息。
def Read_Write_data(filepath):
    ds = rasterio.open(filepath)
    bands = ds.read()  # 以数组的形式读取所有波段
    band1 = ds.read(1, window=Window(0, 0, 512, 256))  # 以数组的形式打开波段1读取512*256
    new_dataset = rasterio.open(
        '/tmp/new.tif',
        'w',
        driver='GTiff',
        height=band1.shape[0],
        width=band1.shape[1],
        count=1,
        dtype=band1.dtype,
        crs='+proj=latlong',  # ds.crs
        transform=ds.transform,
    )
    new_dataset.write(band1, 1)  # 将band1的值写入new_dataset的第一个波段
3.3 可视化影像
这里是Rasterio自己集成了一个显示函数,不用我们自己再去使用matplotlib库绘制影像了。我这里就展示了一种用法,官方给了好几个demo,大家有兴趣可以自己去看。
def Show_data(filepath):
    ds = rasterio.open(filepath)
    show(ds, transform=ds.transform)
3.4 计算NDVI
这里给大家介绍一个经典案例,就是NDVI的计算。通过这个应该很容易就能理解Rasterio库的数据结构了。
def Get_NDVI(filepath):
    ds = rasterio.open(filepath)
    red = ds.read(4).astype('float64')
    nir_red = ds.read(5).astype('float64')
    ndvi = (nir_red - red) / (nir_red + red)
    new_dataset = rasterio.open('ndvi.tif',
                                'w',
                                driver='GTiff',
                                height=ds.height,
                                width=ds.width,
                                count=1,
                                dtype='float64',
                                crs=ds.crs,
                                transform=ds.transform)
    new_dataset.write(ndvi, 1)
    new_dataset.close()
4 完整代码
# -*- coding: utf-8 -*-
"""
@Time : 2023/10/19 11:20
@Auth : RS迷途小书童
@File :Rasterio Functions.py
@IDE :PyCharm
@Purpose:rasterio库常用操作
"""
import os
import rasterio
from rasterio.plot import show
from rasterio.windows import Window
def Get_data(filepath):
    ds = rasterio.open(filepath)  # 打开文件
    ds_bands = ds.count  # 波段数
    ds_width = ds.width  # 宽度
    ds_height = ds.height  # 高度
    ds_bounds = ds.bounds  # 四至范围
    ds_geo = ds.transform  # 仿射地理变换参数
    ds_prj = ds.crs  # 投影坐标系
    # print(ds.crs.wkt)
    # ds.nodatavals  # 缺失值
    # ds.dirver  # 数据格式
    print("影像的宽度为:" + str(ds_width))
    print("影像的高度为:" + str(ds_height))
    print("仿射地理变换参数为:" + str(ds_geo))
    print("投影坐标系为:" + str(ds_prj))
def Read_Write_data(filepath):
    ds = rasterio.open(filepath)
    bands = ds.read()  # 以数组的形式读取所有波段
    band1 = ds.read(1, window=Window(0, 0, 512, 256))  # 以数组的形式打开波段1读取512*256
    new_dataset = rasterio.open(
        '/tmp/new.tif',
        'w',
        driver='GTiff',
        height=band1.shape[0],
        width=band1.shape[1],
        count=1,
        dtype=band1.dtype,
        crs='+proj=latlong',  # ds.crs
        transform=ds.transform,
    )
    new_dataset.write(band1, 1)  # 将band1的值写入new_dataset的第一个波段
def Show_data(filepath):
    ds = rasterio.open(filepath)
    show(ds, transform=ds.transform)
def Get_NDVI(filepath):
    ds = rasterio.open(filepath)
    red = ds.read(4).astype('float64')
    nir_red = ds.read(5).astype('float64')
    ndvi = (nir_red - red) / (nir_red + red)
    new_dataset = rasterio.open('ndvi.tif',
                                'w',
                                driver='GTiff',
                                height=ds.height,
                                width=ds.width,
                                count=1,
                                dtype='float64',
                                crs=ds.crs,
                                transform=ds.transform)
    new_dataset.write(ndvi, 1)
    new_dataset.close()
if __name__ == "__main__":
    filepath1 = r'B:\Personal\Rasterio_try/46_22.tif'
总结来说,Rasterio库是一个很好的二次封装的库,可以更方便快捷地处理遥感栅格数据。但我个人使用GDAL习惯了,所以不怎么用Rasterio库,如果大家刚开始学习使用Python去处理地理空间数据,那么Rasterio库是一个很好的推荐。

")


")

