
打包部署若依SpringBoot后端和Vue前端


.png)


(1)、打包若依SpringBoot后端
打开若依,点击右侧的Maven展开Maven管理,选择ruoyi>Lifecycle 先双击clean清除原本启动项目时生成的文件。然后点击package等待项目打包
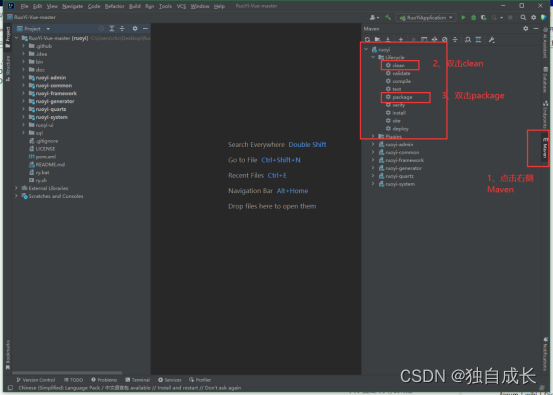
打包完成后会在ruoyi-admin>src>target里面看到.jar后缀的文件,就代表打包成功(可以把这个文件复制出来存放到其他地方,方便后面启动)

(2)、部署若依SpringBoot后端
把刚刚打包好的文件存放到自己的文件位置

然后在路径栏里输入cmd,回车会打开一个命令框


在命令框里输入java -jar ruoyi-admin.jar回车启动打包好的jar包。

这个窗口不要关闭!!!!关闭就是结束运行了
(3)、打包若依Vue前端
使用Visual Studio Code打开ruoyi-ui文件夹
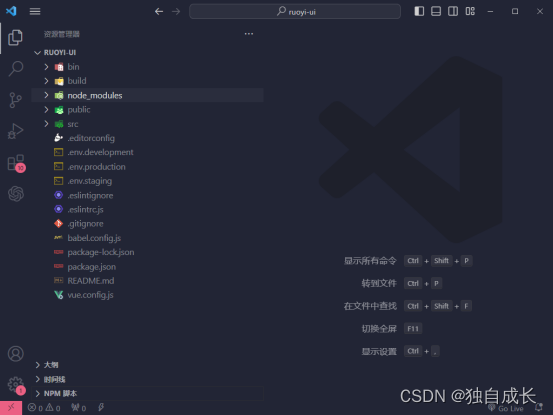
打开终端:左上角任务栏选择终端>新建终端

在新建终端中输入命令npm run build:prod,回车等待打包完成
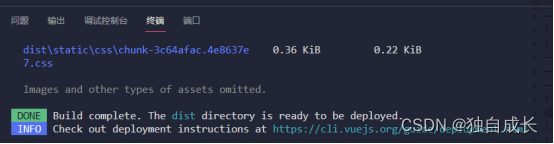
打包完成后查看文件目录,有一个叫dist的文件夹就是打包成功了,dist的文件夹介绍打包的Vue项目了

(4)、部署若依Vue前端
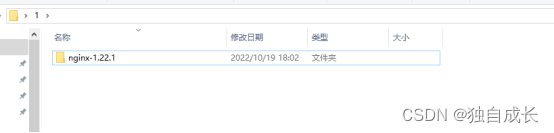
前端部署需要使用nginx 下载地址(https://nginx.org/en/download.html)下载

下载完成解压到任意地方
然后进入nginx-1.22.1>html 把刚刚打包好的Vue前端dist文件复制进来

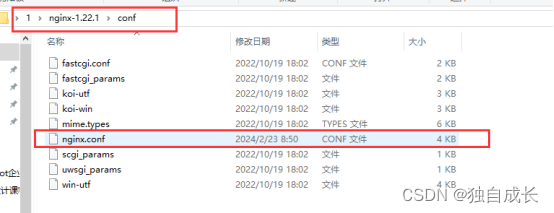
然后返回上一层 进入conf文件夹
用Visual Studio Code打开nginx.conf
更改以下代码(改完ctrl+s保存就可以关闭Visual Studio Code)
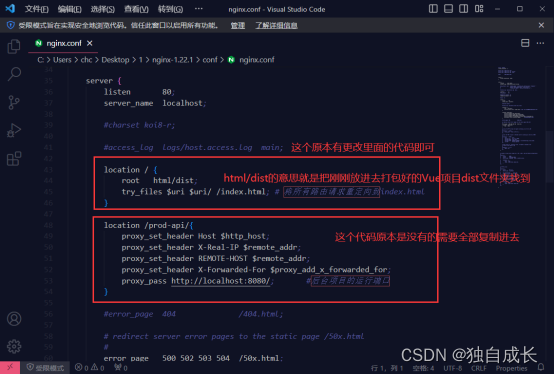
        location / {
            root   html/dist;  // 打包好的文件路径
            try_files $uri $uri/ /index.html; # 将所有路由请求重定向到index.html
        }
        location /prod-api/{
            proxy_set_header Host $http_host;
            proxy_set_header X-Real-IP $remote_addr;
            proxy_set_header REMOTE-HOST $remote_addr;
            proxy_set_header X-Forwarded-For $proxy_add_x_forwarded_for;
            proxy_pass http://localhost:8080/;       #后台项目的运行端口
        }
启动ngxin 首先回到nginx-1.22.1文件夹里
在路径栏里输入cmd,回车会打开一个命令框
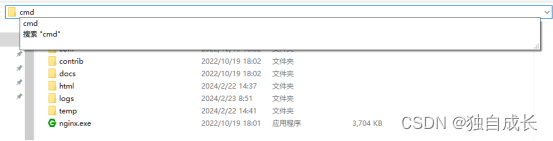

在命令行里输入start nginx 回车会出现闪一下,就代表启动了
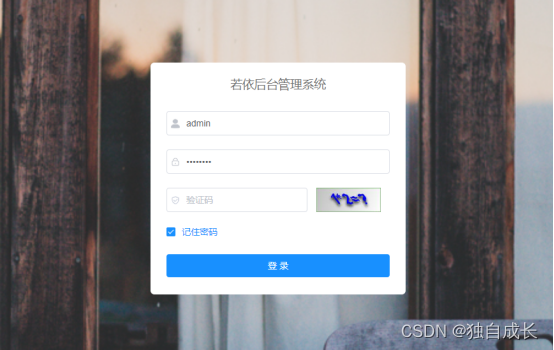
然后在浏览器地址栏中输入http://localhost/ 回车 出现若依的登录页面就代表全部部署完成 (如果打开的时候提示系统接口502异常原因结束后端的命令窗口关闭了)
停止运行的话在命令行输入nginx -s stop回车(前端),后端的直接关闭命令窗口就可以了


")

")

