
flutter开发实战-flutter二维码条形码扫一扫功能实现


.png)


flutter开发实战-flutter二维码条形码扫一扫功能实现
flutter开发实战-flutter二维码扫一扫功能实现,要使用到摄像头的原生的功能,使用的是插件:scan
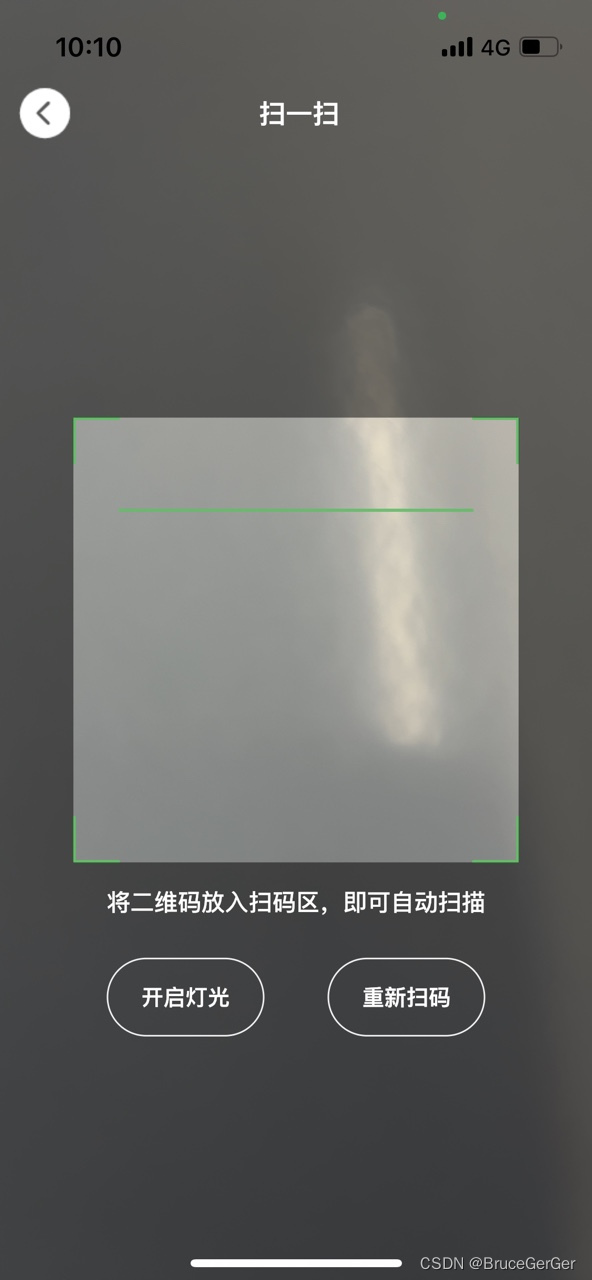
效果图如下
一、扫一扫插件scan
  # 扫一扫
  scan: ^1.6.0
1.1 iOS权限设置
NSCameraUsageDescription
Your Description
io.flutter.embedded_views_preview
YES
1.2 android权限设置
1.3 使用ScanView的widget
ScanController controller = ScanController();
String qrcode = 'Unknown';
Container(
  width: 250, // custom wrap size
  height: 250,
  child: ScanView(
    controller: controller,
// custom scan area, if set to 1.0, will scan full area
    scanAreaScale: .7,
    scanLineColor: Colors.green.shade400,
    onCapture: (data) {
      // do something
    },
  ),
),
扫一扫Widget使用ScanController来做响应的控制
暂停/恢复camera
controller.pause();
controller.resume();
识别图片的二维码结果
String result = await Scan.parse(imagePath);
闪光灯切换
controller.toggleTorchMode();
二、代码实现
实现自定义扫码的appBar
class QrScanAppBar extends StatefulWidget {
  const QrScanAppBar({
    Key? key,
    required this.toolbarHeight,
    this.elevation,
    this.backgroundColor,
    this.leadingWidget,
    this.trailingWidget,
    this.centerWidget,
    this.brightness,
    this.padding, this.barPadding,
  }) : super(key: key);
  final double toolbarHeight;
  final double? elevation;
  final Color? backgroundColor;
  final Widget? leadingWidget;
  final Widget? trailingWidget;
  final Widget? centerWidget;
  final Brightness? brightness;
  final EdgeInsetsGeometry? padding;
  final EdgeInsetsGeometry? barPadding;
  @override
  State createState() => _QrScanAppBarState();
}
class _QrScanAppBarState extends State {
  @override
  Widget build(BuildContext context) {
    final SystemUiOverlayStyle overlayStyle =
        widget.brightness == Brightness.dark
            ? SystemUiOverlayStyle.light
            : SystemUiOverlayStyle.dark;
    Widget leadingWidget = (widget.leadingWidget ?? Container());
    Widget centerWidget = (widget.centerWidget ?? Container());
    Widget trailingWidget = (widget.trailingWidget ?? Container());
    return AnnotatedRegion(
      //套AnnotatedRegion是为了增加状态栏控制
      value: overlayStyle,
      child: Material(
        //套Material是为了增加elevation
        elevation: widget.elevation ?? 0,
        color: Colors.transparent,
        child: Container(
          padding: widget.padding,
          height: widget.toolbarHeight + ScreenUtil().statusBarHeight,
          decoration: BoxDecoration(
            color: widget.backgroundColor,
          ),
          child: Column(
            mainAxisAlignment: MainAxisAlignment.center,
            crossAxisAlignment: CrossAxisAlignment.center,
            children: [
              Container(
                height: ScreenUtil().statusBarHeight,
              ),
              Expanded(
                child: Container(
                  padding: widget.barPadding,
                  height: widget.toolbarHeight,
                  alignment: Alignment.center,
                  child: Row(
                    mainAxisAlignment: MainAxisAlignment.center,
                    crossAxisAlignment: CrossAxisAlignment.center,
                    children: [
                      Container(
                        height: widget.toolbarHeight,
                        child: leadingWidget,
                      ),
                      Expanded(
                        child: Container(
                          alignment: Alignment.center,
                          height: widget.toolbarHeight,
                          child: centerWidget,
                        ),
                      ),
                      Container(
                        height: widget.toolbarHeight,
                        child: trailingWidget,
                      ),
                    ],
                  ),
                ),
              )
            ],
          ),
        ),
      ),
    );
  }
}
实现扫一扫界面
class QrScanPage extends StatefulWidget {
  const QrScanPage({Key? key, this.arguments}) : super(key: key);
  final Object? arguments;
  @override
  State createState() => _QrScanPageState();
}
class _QrScanPageState extends State {
  ScanController scanController = ScanController();
  String qrcode = 'Unknown';
  bool torchOn = false;
  @override
  void initState() {
    // TODO: implement initState
    super.initState();
  }
  @override
  void dispose() {
    // TODO: implement dispose
    scanController.pause();
    super.dispose();
  }
  void changedTorchMode() {
    scanController.toggleTorchMode();
    if (torchOn == true) {
      torchOn = false;
    } else {
      torchOn = true;
    }
    setState(() {});
  }
  void refreshScan() {
    scanController.resume();
  }
  // controller.resume();
  // controller.pause();
  // String result = await Scan.parse(imagePath);
  @override
  Widget build(BuildContext context) {
    return Scaffold(
      body: Stack(
        children: [
          buildQrScanView(context),
          Positioned(
            child: buildAppBar(context),
          ),
        ],
      ),
    );
  }
  Widget buildQrScanView(BuildContext context) {
    double width = MediaQuery.of(context).size.width;
    double height = MediaQuery.of(context).size.height;
    double scanW = width * 0.75;
    double scanMY = (height - scanW) / 2.0 + scanW + 15.0;
    return Container(
          alignment: Alignment.center,
          child: Stack(
            alignment: Alignment.center,
            children: [
              ScanView(
                controller: scanController,
                // custom scan area, if set to 1.0, will scan full area
                scanAreaScale: 0.75,
                scanLineColor: Colors.green.shade400,
                onCapture: (data) {
                  // do something
                  LoggerManager().debug("onCapture:${data}");
                  openQrScanWebPage(data);
                },
              ),
              Positioned(
                top: scanMY,
                child: buildOption(context, scanMY),
              ),
            ],
          ),
        );
  }
  Widget buildAppBar(BuildContext context) {
    return QrScanAppBar(
      toolbarHeight: 44.0,
      backgroundColor: Colors.transparent,
      padding: EdgeInsets.symmetric(horizontal: 10.0),
      barPadding: EdgeInsets.symmetric(vertical: 4.0),
      leadingWidget: Container(
        alignment: Alignment.center,
        child: QrscanButton(
          bgColor: ColorUtil.hexColor(0xA9A9A9),
          bgHighlightedColor: ColorUtil.hexColor(0xf0f0f0),
          borderColor: Colors.transparent,
          onPressed: () {
            navigatorBack();
          },
          borderRadius: 18.0,
          height: 36.0,
          width: 36.0,
          child: ImageHelper.wrapAssetAtImages(
            "icons/ic_scan_navback.png",
            width: 36.0,
            height: 36.0,
            fit: BoxFit.fill,
          ),
        ),
      ),
      centerWidget: Text(
        S.of(context).qrScan,
        textAlign: TextAlign.center,
        softWrap: true,
        style: TextStyle(
          fontSize: 17,
          color: ColorUtil.hexColor(0xffffff),
          fontWeight: FontWeight.w600,
          fontStyle: FontStyle.normal,
          decoration: TextDecoration.none,
        ),
      ),
      trailingWidget: Container(
        width: 32.0,
        height: 32.0,
      ),
    );
  }
  Widget buildOption(BuildContext context, double originY) {
    return Container(
      height: ScreenUtil().screenHeight - originY,
      width: ScreenUtil().screenWidth,
      child: Column(
        mainAxisAlignment: MainAxisAlignment.center,
        crossAxisAlignment: CrossAxisAlignment.center,
        children: [
          Container(
            width: 300.0,
            child: Text(
              S.of(context).qrScanBottomTip,
              textAlign: TextAlign.center,
              softWrap: true,
              style: TextStyle(
                fontSize: 15,
                fontWeight: FontWeight.w500,
                fontStyle: FontStyle.normal,
                color: Colors.white,
                decoration: TextDecoration.none,
              ),
            ),
          ),
          SizedBox(
            height: 25.0,
          ),
          buildButtons(context),
          Expanded(
            child: Container(),
          ),
        ],
      ),
    );
  }
  Widget buildButtons(BuildContext context) {
    return Row(
      mainAxisAlignment: MainAxisAlignment.center,
      crossAxisAlignment: CrossAxisAlignment.center,
      children: [
        Padding(
          padding: EdgeInsets.symmetric(horizontal: 20.0),
          child: QrscanButton(
            bgColor: ColorUtil.hexColor(0x35fb99),
            bgHighlightedColor: Colors.green.shade400,
            onPressed: () {
              changedTorchMode();
            },
            width: 100.0,
            height: 50.0,
            borderRadius: 25.0,
            child: Text(
              (torchOn
                  ? S.of(context).qrScanTorchOff
                  : S.of(context).qrScanTorchOn),
              textAlign: TextAlign.center,
              softWrap: true,
              style: TextStyle(
                fontSize: 14,
                color: ColorUtil.hexColor(0xffffff),
                fontWeight: FontWeight.w600,
                fontStyle: FontStyle.normal,
                decoration: TextDecoration.none,
              ),
            ),
          ),
        ),
        Padding(
          padding: EdgeInsets.symmetric(horizontal: 20.0),
          child: QrscanButton(
            bgColor: ColorUtil.hexColor(0x35fb99),
            bgHighlightedColor: Colors.green.shade400,
            onPressed: () {
              refreshScan();
            },
            width: 100.0,
            height: 50.0,
            borderRadius: 25.0,
            child: Text(
              S.of(context).qrScanRefresh,
              textAlign: TextAlign.center,
              softWrap: true,
              style: TextStyle(
                fontSize: 14,
                color: ColorUtil.hexColor(0xffffff),
                fontWeight: FontWeight.w600,
                fontStyle: FontStyle.normal,
                decoration: TextDecoration.none,
              ),
            ),
          ),
        ),
      ],
    );
  }
  void navigatorBack() {
    NavigatorPageRouter.pop();
  }
  void openQrScanWebPage(String data) {
    Map args = {};
    args["url"] = data;
    /// true保留跳转的当前栈   false 不保留
    NavigatorPageRouter.pushReplacementNamed(
      RouterName.web,
      arguments: args,
    );
  }
}
三、小结
flutter开发实战-flutter二维码扫一扫功能实现,要使用到摄像头的原生的功能,使用的是插件:scan,实现自定义Appbar。
学习记录,每天不停进步。
文章版权声明:除非注明,否则均为主机测评原创文章,转载或复制请以超链接形式并注明出处。

")


")