
【MySQL系列】在 MacOS 上安装 MySQL
温馨提示:这篇文章已超过376天没有更新,请注意相关的内容是否还可用!
在 MacOS 上有两种方式安装 MySQL 服务器:通过 brew 安装和通过安装包安装。
文章目录
- 1、通过 brew 安装 MySQL
- 1.1、安装 MySQL
- 1.2、启动 MySQL 服务器
- 1.3、配置 MySQL 服务器
- 1.4、MySQL 服务器管理命令
- 2、通过安装包安装 MySQL
- 2.1、下载安装包
- 2.2、安装 MySQL
- 2.3、管理 MySQL
1、通过 brew 安装 MySQL
在 MacOS 上,我们可以通过 brew 很容易地安装 MySQL。
1.1、安装 MySQL
brew install mysql
1.2、启动 MySQL 服务器
brew services start mysql
1.3、配置 MySQL 服务器
我们需要运行以下脚本配置 MySQL 服务器的安全性:
mysql_secure_installation
在这个过程中,我们可以设置 root 的密码,配置一些选项以增强 MySQL 服务器的安全性。我们会看到如下类似的输出:
Securing the MySQL server deployment.
Connecting to MySQL using a blank password.
VALIDATE PASSWORD COMPONENT can be used to test passwords
and improve security. It checks the strength of password
and allows the users to set only those passwords which are
secure enough. Would you like to setup VALIDATE PASSWORD component?
Press y|Y for Yes, any other key for No: Y
There are three levels of password validation policy:
LOW    Length >= 8
MEDIUM Length >= 8, numeric, mixed case, and special characters
STRONG Length >= 8, numeric, mixed case, special characters and dictionary                  file
Please enter 0 = LOW, 1 = MEDIUM and 2 = STRONG: 0
Please set the password for root here.
New password:
Re-enter new password:
Estimated strength of the password: 25
Do you wish to continue with the password provided?(Press y|Y for Yes, any other key for No) : Y
By default, a MySQL installation has an anonymous user,
allowing anyone to log into MySQL without having to have
a user account created for them. This is intended only for
testing, and to make the installation go a bit smoother.
You should remove them before moving into a production
environment.
Remove anonymous users? (Press y|Y for Yes, any other key for No) : Y
Success.
Normally, root should only be allowed to connect from
'localhost'. This ensures that someone cannot guess at
the root password from the network.
Disallow root login remotely? (Press y|Y for Yes, any other key for No) : Y
Success.
By default, MySQL comes with a database named 'test' that
anyone can access. This is also intended only for testing,
and should be removed before moving into a production
environment.
Remove test database and access to it? (Press y|Y for Yes, any other key for No) : Y
 - Dropping test database...
Success.
 - Removing privileges on test database...
Success.
Reloading the privilege tables will ensure that all changes
made so far will take effect immediately.
Reload privilege tables now? (Press y|Y for Yes, any other key for No) : Y
Success.
All done!
1.4、MySQL 服务器管理命令
brew 提供了实用的命令可以管理 MySQL 服务器。
- brew services start mysql: 启动 MySQL 服务器,并设置为自启动;
- brew services stop mysql: 停止 MySQL 服务器,并设置为不自启动;
- brew services run mysql: 只启动 MySQL 服务器;
- mysql.server start: 启动 MySQL 服务器;
- mysql.server stop: 停止 MySQL 服务器。
2、通过安装包安装 MySQL
通过安装包安装 MySQL 的过程有友好的 UI 界面,更加的方便快捷。
2.1、下载安装包
点击 这里 去下载 MySQL 社区版的 dmg 文件,它包含了 MySQL 的安装器。
2.2、安装 MySQL
下载安装包后,按照以下步骤进行安装:
- 双击下载 dmg 文件。双击后,会看到 MySQL 安装器文件,比如: mysql-8.3.0-macos14-x86_64.pkg。双击 MySQL 安装器文件;
- 在「介绍」页面,直接点击「继续」按钮;
- 在「许可」页面,直接点击「继续」按钮;
- 在「安装类型」页面,可以直接点击「安装」按钮,也可以先点击 “自定义” 按钮选择要安装的组件后再点击「安装」按钮。
- 在「配置」页面,密码加密方式选择 Use Strong Password Entryption。然后,输入 root 用户的密码。点击「Finish」按钮就完成安装了
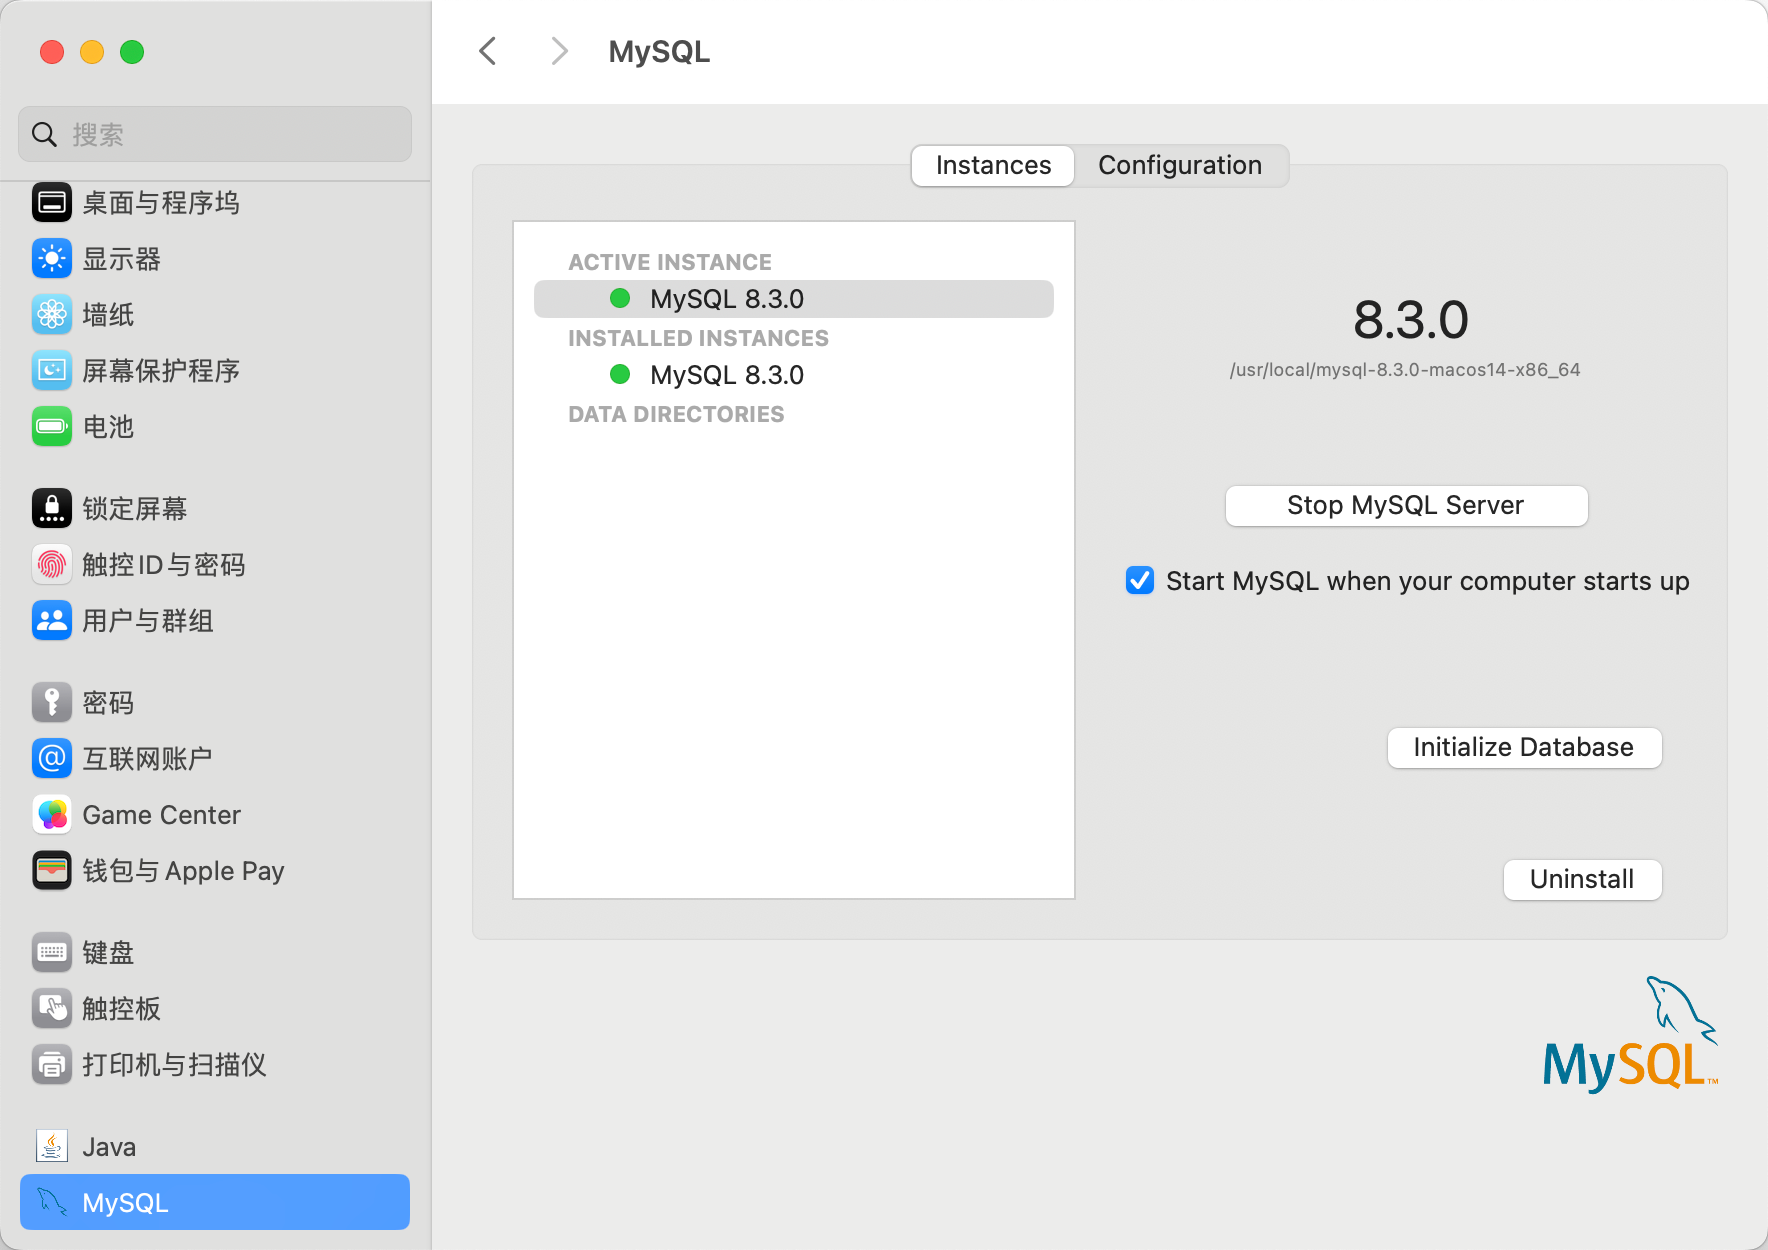
2.3、管理 MySQL
MySQL 偏好窗格会被默认安装。我们可以在系统偏好窗口中找到它。MySQL 偏好窗格允许我们启动、停止和配置 MySQL。
免责声明:我们致力于保护作者版权,注重分享,被刊用文章因无法核实真实出处,未能及时与作者取得联系,或有版权异议的,请联系管理员,我们会立即处理! 部分文章是来自自研大数据AI进行生成,内容摘自(百度百科,百度知道,头条百科,中国民法典,刑法,牛津词典,新华词典,汉语词典,国家院校,科普平台)等数据,内容仅供学习参考,不准确地方联系删除处理! 图片声明:本站部分配图来自人工智能系统AI生成,觅知网授权图片,PxHere摄影无版权图库和百度,360,搜狗等多加搜索引擎自动关键词搜索配图,如有侵权的图片,请第一时间联系我们,邮箱:ciyunidc@ciyunshuju.com。本站只作为美观性配图使用,无任何非法侵犯第三方意图,一切解释权归图片著作权方,本站不承担任何责任。如有恶意碰瓷者,必当奉陪到底严惩不贷!


